Una vez completado el rig, el siguiente paso es hacer que éste mueva los vértices de la malla tridimensional del cuerpo del minifig, para ello aplicaremos el modificador skin sobre la geometría añadiéndole los huesos necesarios del rig ya que no todos afectarán a la deformación. Empezaré con el Bones Rig, los demás rigs se adaptarán a éste con la herramienta Skin Utilities, extrayendo los pesos o weights con los que afectan en porcentaje distintos huesos sobre un mismo vértice y comparando cada hueso de los distintos rigs. Al final obtendremos un "mapa" con zonas claras y oscuras que representan el porcentaje del envelope o envolvente del hueso que tengamos seleccionado en ese momento.
Once the rig is completed, next step is to make it move the vertexs of the thridimensional mesh of the minifig body, for that we apply a skin modifier over the geometry adding the necessary bones from de rig, other rigs will adapt to this one with the Skin Utilities, extracting the vertex weights and comparing each bone from diferent rigs. At the end we will obtain a "map" with light and dark areas representing the selected bone envelope percentage.
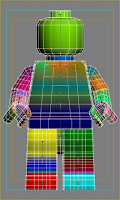
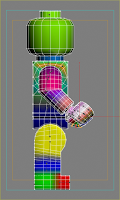
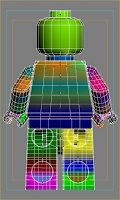
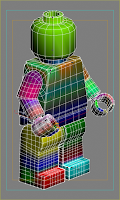
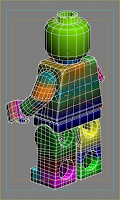
Cada envolvente afecta a los vértices de forma visible en un gradiente de colores en los que el rojo representa proximidad al 100%, amarillo al 50% y azul cercanía al 0%. El color gris representa que esos vértices no son afectados por el envolvente seleccionado.
Each envelope affects the vertexs visually in a gradient of colors in wich red means proximity to 100%, yellow to 50% and blue to 0%. Gray color means that those vertexs are not affected by the selected envelope.
Cabeza y Cuello
Los únicos vértices con algo de dificultad a la hora de "pintar" los pesos o weights son los que se encuentran entre el cuello y los hombros. Se verán afectados en algunos casos hasta por 3 ó 4 huesos o mejor dicho por sus envolventes. Los problemas se presentarán al aplicar los porcentajes; al variar uno de ellos, los otros se adaptarán hasta completar el 100% entre todos los envolventes. Al ser más de 2 se hace más pesado,de todas formas existe una opción para desactivar que todos los vértices sean "pintados", personalmente prefiero no usarla para no dejar ningún vértice huérfano.
The only vertex with some problems when "painting" the weights are the ones in the zone between the neck and the shoulders. They're being affected in some cases by as far as 3 or 4 bones, or better say by their envelopes. Problems will arrise when applying percentages; once you change one of them, the others will adapt to complete the 100% between all envelopes. Being more than 2 it becomes more tedious, anyway there is an option for stopping all vertex being "painted", personally I prefer not to use it for not getting any orphan vertex.
Espina Dorsal
Spine
En este caso hay 4 envolventes, empezando por el más cercano al cuello, algunos vértices en la zona cercana al hombro y la clavícula son afectados por más de 2 envolventes. Los centrales sólo comparten vértices con los envolventes del brazo superior. El envolvente más bajo de la espina dorsal, junto con los de cada pierna superior afectan a parte de la geometría circular que tiene el minifig a modo de pelvis.
In this case there are 4 envelopes, starting with the closest to the neck, some vertex in between the shoulders and the clavicle or collar bone are being affected by more than 2 envelopes. The center ones only share vertexs with the upper arm's envelopes. The lowest envelope in the spine, with each upper leg's envelope affect to part of the circular geometry that the minifig has as some kind of hips.
In this case there are 4 envelopes, starting with the closest to the neck, some vertex in between the shoulders and the clavicle or collar bone are being affected by more than 2 envelopes. The center ones only share vertexs with the upper arm's envelopes. The lowest envelope in the spine, with each upper leg's envelope affect to part of the circular geometry that the minifig has as some kind of hips.
Hombros
Shoulders
Shoulders
La zona de los hombros suele ser problemática, los vértices son afectados por más de 3 huesos como la clavícula, el brazo superior y algunas partes de la espina dorsal.
The shoulder zone use to be a problematic one, vertexs are affected for more than 3 bones like the clavicle, upper arm and some spine parts.
The shoulder zone use to be a problematic one, vertexs are affected for more than 3 bones like the clavicle, upper arm and some spine parts.
Brazos
Arms
Arms
Manos
Hands
Hands
Simplemente 2 dedos con 3 secciones cada uno, el principio de cada dedo será la zona que habrá que vigilar.
Just 2 fingers with 3 sections each, each finger begining are the zones to be watched.


.png)